Chromebooks are known for their speed and simplicity, and thankfully, taking a screenshot is just as straightforward. Whether you need to capture the entire screen for a presentation or just a small portion for a guide, ChromeOS provides quick and intuitive tools for the job.
This guide will walk you through all the methods to take a screenshot on a Chromebook, from simple keyboard shortcuts to the versatile Screen Capture tool.
The Easiest Way: Chromebook Screenshot Shortcuts
For most users, keyboard shortcuts are the fastest way to capture what’s on your screen.
Full Screen Screenshot
To capture everything visible on your screen, use this simple combination:
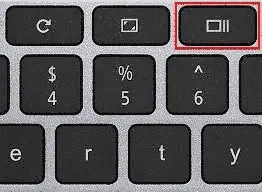
Press Ctrl + Show Windows
The Show Windows key is typically located in the top row of your keyboard. It looks like a rectangle with two vertical lines on the right side.
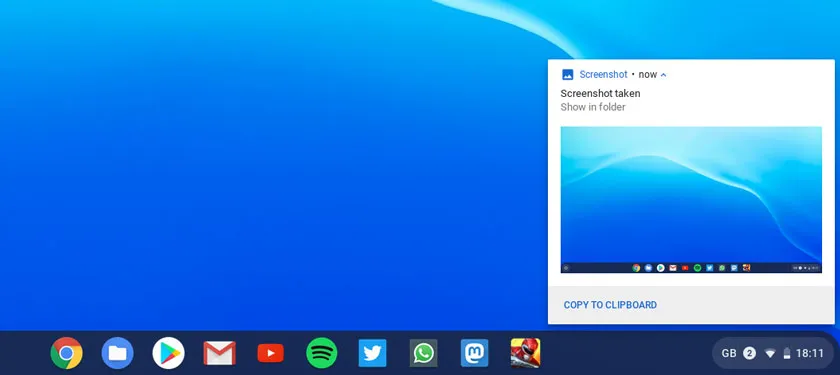
Once you press the keys, a notification will appear at the bottom right, confirming the screenshot has been taken and saved to your “Downloads” folder.
Partial Screenshot (The Chromebook “Snipping Tool”)
If you only need to capture a specific area of your screen, Chromebook has a built-in “snipping” function.
Press Shift + Ctrl + Show Windows
Your cursor will transform into a crosshair. Click and drag to draw a box around the exact area you want to capture. When you release the mouse button, the screenshot will be taken automatically. This is incredibly useful for grabbing a specific chart, image, or piece of text without the clutter of the full screen.
Using an External Keyboard?
If you’re using a standard external keyboard that doesn’t have a Show Windows key, you can use these alternative shortcuts:
- Full Screenshot:
Ctrl+F5 - Partial Screenshot:
Shift+Ctrl+F5
The All-in-One Screen Capture Tool
For more control over your screenshots and even screen recordings, ChromeOS has a dedicated Screen Capture toolbar.
To open it, use the same shortcut as the partial screenshot: Shift + Ctrl + Show Windows. Alternatively, you can click the time in the bottom-right corner of your screen (the Shelf) and select “Screen capture” from the Quick Settings menu.
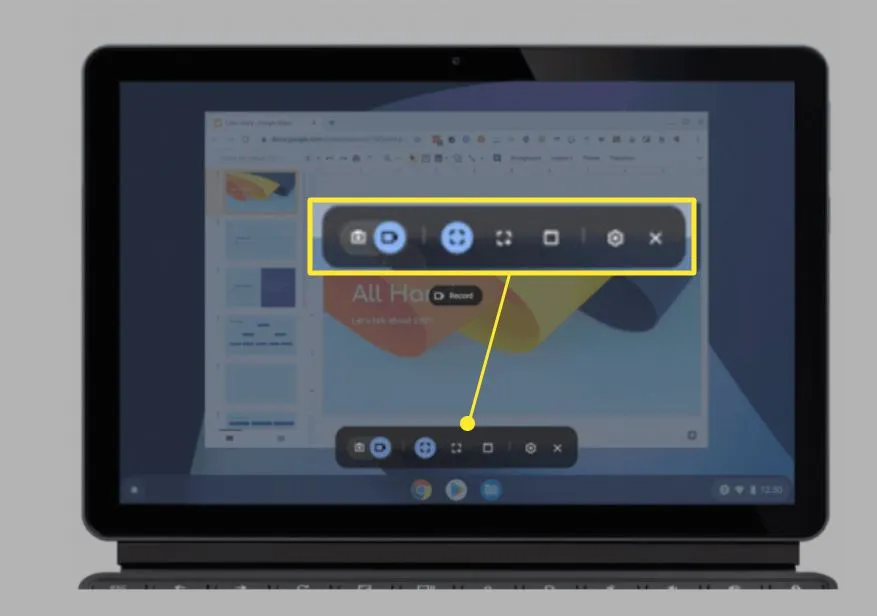
This toolbar gives you several options:
- Screenshot/Screen Record Toggle: Switch between taking a picture or recording a video.
- Capture Mode: Choose between capturing the full screen, a select area (partial), or a specific window. The window capture option is perfect for getting a clean shot of a single app without your background or other windows interfering.
What to Do After Taking a Screenshot
Once you’ve captured your screen, what’s next?
Finding Your Screenshots
By default, all screenshots are saved as PNG files in your “Downloads” folder.
Immediately after you take a screenshot, a notification will pop up with a thumbnail of the image. From here, you can:
- Copy to clipboard: This is extremely useful for quickly pasting the image into a document, email, or another app like Google Keep.
- Edit: Click the “Edit” button to open the screenshot in the built-in Gallery app for quick edits.
Editing Your Screenshots
The default Gallery app in ChromeOS offers basic but essential editing tools. You can:
- Crop and Rotate: Trim the image to the perfect size.
- Annotate: Add text, lines, or highlights to point out specific details.
- Adjust lighting: Modify brightness and contrast.
For more advanced editing, you might consider web-based tools or Android apps from the Google Play Store. For more details, you can read our other articles, such as how to take a screenshot on Windows or how to take a screenshot on Mac.
For Chromebook Tablet Users
If you’re using a Chromebook in tablet mode, the process is similar to other mobile devices:
Press the Power button + Volume down button simultaneously.
Bonus
For those who want the most powerful and up-to-date version, we highly recommend visiting the official CocoShot website. It’s a fantastic, powerfull, privacy-focused tool for all your screenshot needs and more.
Conclusion
Capturing your screen on a Chromebook is a simple and powerful feature. Whether you prefer the speed of keyboard shortcuts like Ctrl + Show Windows or the flexibility of the Screen Capture tool, you have plenty of options. Now that you know how to take full, partial, and window screenshots, you can easily save and share information right from your Chromebook.